Got Gas
Well as promised here is how I fitted my Truck out to run on LPG. Now this is no definitive how to just how I did it and always read the instructions on the tin and be sensible. ;o) Jeez what is this country like now eh how we have to add disclaimers all the time.. but that’s what we have allowed to happen so we deserve it don’t we ;o) That said here we go.
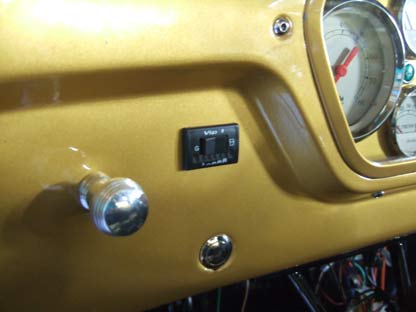
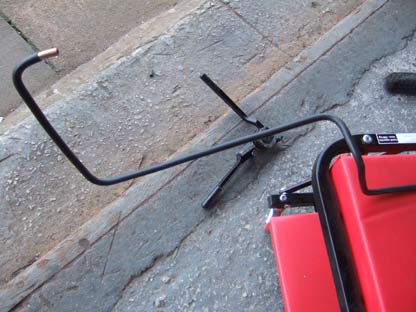
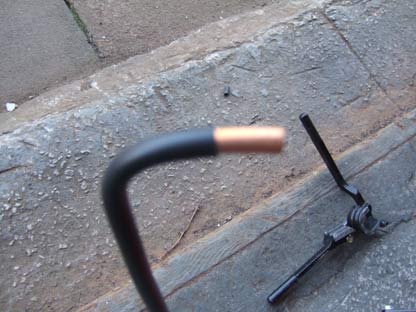
I suppose you can do it in any order you wish I just started with the wiring of the switch, now this is no ordinary switch, it is a safety switch that gives a short (upto 3sec) burst of LPG for starting and gets a signal from your coil to let it know the engine is running and then send constant power to the lpg valve. Not sure where my wiring pic is? But from memory, there is power from the ign switch, an earth, one to tank sender, power to the LPG Valve, power to the petrol pump and one to the coil all should be shown on your wiring diagram that comes with the switch.. THIS SWITCH IS IMPORTANT in the LPG position it powers up the LPG and cuts off the power to the petrol pump, in the centre position it cuts all power so you can run carb out of petrol as you change over and the petrol position, cuts off the LPG and power’s the Petrol pump. The 3 sec spurt is vital as if it is powered all the time it will be firing Gas in all the time you are trying to start the engine and a bad starter will go BOOM!!!!
I ran the wires from the switch to the bed for the tank, which is sender (green) and there is another magnetic switch on the tank to that needs power, I split the wire that goes to the vaporizer valve so the both open at the same time. they then just need earths.
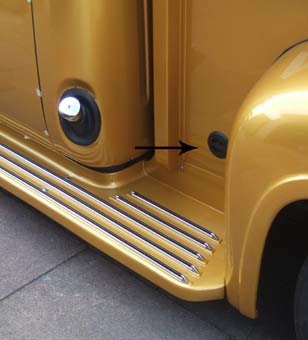
Find a suitable location for your filler, I chose one near the petrol one so I wont get confused when filling up which side to go to. It is just a case of cutting a hole for it to fit in and bolting up through the back.
As shown here.
then the filler pipe simply bolts up with a gas union, I got a proper made pipe for the filler to tank and sealed the threads with gas paste.
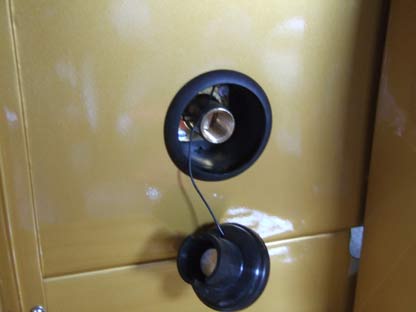
Here is the most commonly used filler connection nice and neat dead easy to fill.
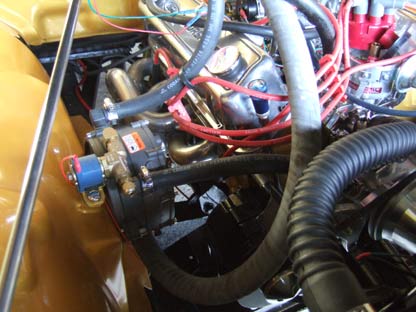
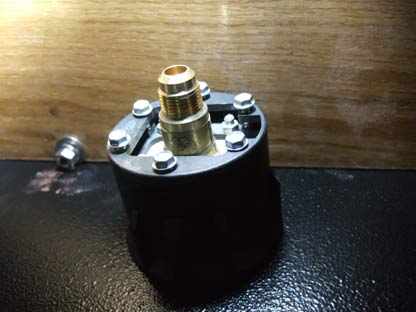
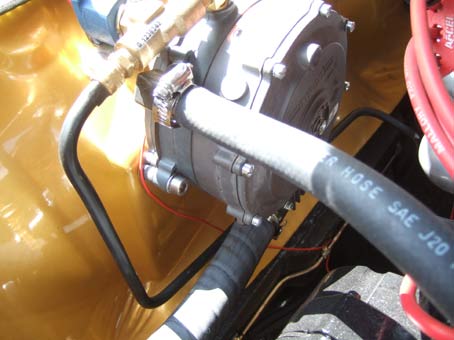
Here is the vaporizer, it is to be mounted vertical like this and and must be in this plane as there is a very light spring that if say mounted on the bulkhead would open and shut the valve as you accelerate and brake .. not what you want eh. I am sure I had some better photos than this but I cant find them… but if you study this photo you will see the heater pipes run through it just simply cut one pipe and fit one end in the front fitting and the other to the outlet on the vaporizer. This gets fed liquid LPG when the ignition is turned on through the little blue valve you see on the left that has one (red) power from LPG switch to it. The heat from the heater pipes helps the vaporizer work more efficiently as the engine warms. The thick pipe is the carb feed (more later)
Now I hard piped the system, which is just one plastic coated copper pipe (specially for the LPG) that needs to be routed from the tank to the vaporizer or as in my case, the vaporize to the tank. I bent up a coat hanger or two to get the correct bends first and double checked the fit.
Then bent up the LPG hard pipe to match the wire templates Voila.
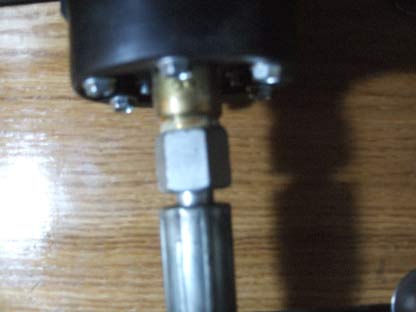
The end needs the plastic cutting back and then just tighten into the Valve with a gas olive fitting.
This is a better photo of the hard pipe (LPG inlet) and heater pipe, the gas is fed through the wired valve into the vaporizer.
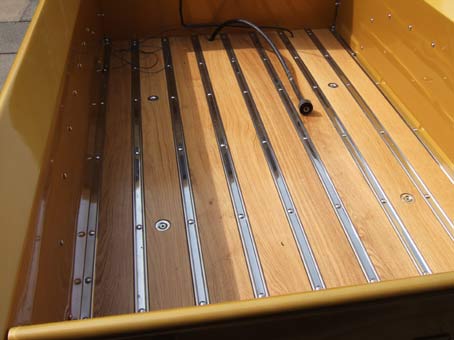
So now we have the power to the system and the pipes to fill and send to the engine. The frame is now fitted as secure as you can. I chose the biggest tank I could fit as I wanted to buy local (cheaper) LPG and as big a range as possible so I don’t have to pay the higher price on the motorway services. Also when I started this build it was to be my daily so I didn’t care if the tank was on show.. now I think I would go for an under floor tank so it wasn’t on show… but hey ho eh!
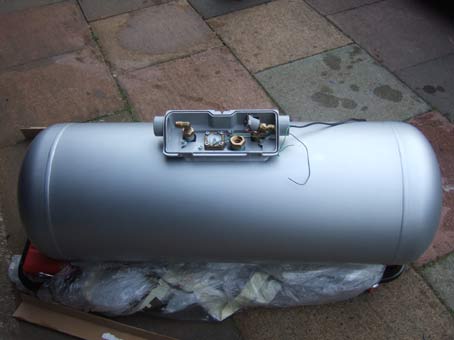
This is the tank I used It holds about 130?ltrs I think it is, though they only fill to 80%.
It is what is known as a 4 hole tank. Left is the gas in, then the tank gauge (the switch has one to) then the blow off valve in case of internal fire and far right is the wired magnetic valve and gas out where the black plastic coated hard pipe fits. Where there was thread I used gas paste to seal. The tank fitting’s must be extra tight to make sure they seal.
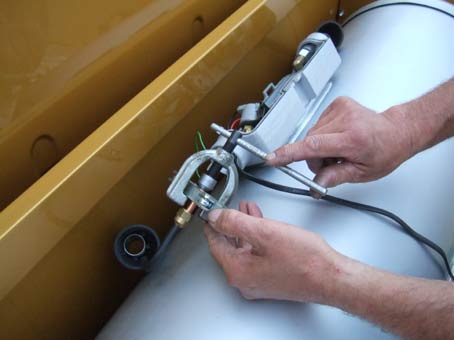
The Tank must be angled, mine works perfect (read note below) but most I have seen are angled even more than this, its just I had cut the hard pipe at this angle so I left it and also I can open the hatch and check stuff if I need. The end of the hard pipe needed flaring so you need a brake pipe flaring tool to do this task.
Right got to fess up I am a proper numpty and I do hope anyone who has followed my instructions didn’t fit their tank same orientation as I did… Cus it was leaning in totally the wrong direction.. Here is why.
For the tank pickup to sit in the Liquid, the tank needs to be set in the same plain as the tank in the photo.

I had mine leaning with the pipes forward so the pick up was only halfway down the tank, so I was only using half the tanks LPG. I wondered why the 130ltr tank only took anything from 50ltrs to 70ltr max… I have loosened the straps on mine now and took the outlet hard pipe off so I could rotated the tank to the correct angle. Just needed to lengthen the wires to the solenoid and extended the hard pipe.. Over the winter I will turn the tank round so the pipes are hidden… Bugger I had just had the tank art work done… A little knowledge eh!
But in my defense, I must add the guy I bought the system from, when I asked about the angle, I said did it matter if it leaned back or forward and he said no… but I guess we had crossed wires… All’s well that ends well that’s what I say ;o).. I now will have full 100ltr range.. yeeha.. what a Twat!!

Now then what ya recon to this then? Cool eh.. first let me tell how this came about.
When I got the system from gastech (Stuart Eckersly a Rodder) he recommended this system as I have a engine capable of in excess of 200bhp and I wanted to use LPG all the time, this is the best set up as it uses the biggest cfm mixer you can get. There are other methods like the one that sits in a std looking air pan, that has a diaphragm that lifts for Petrol and drops on the carb top for LPG. Why? well apparently when on Gas it uses 80% less air so if left at that for petrol it would run far to rich, so up it lets in the air for petrol and down cuts it off for LPG. I am not to sure whether this system lets in the extra air on Petrol but it seems to work Ok. Now the pan was just plain and looked like a saucepan and I really didn’t think it was going to look good in the engine bay. Then a guy got in touch with me out of the blue just simply talking about my web site, it turned out he was a class engraver and *bing*… a plan was hatched. The guys name is Degs (Derek) and he does lots of chopper work and loves the Rods etc and also would love to do more Custom work so if you fancy some and it isn’t silly expensive this was £120 and worth every penny in my book, as its all done by hand check him out at http://www.engravingart.co.uk/home.html and say Holmsey or ukhotrods sent you he is a real genuine guy with a massive talent. He polished the pan to, I think its now the coolest thing in the engine bay.

That’s basically it all that was left to hook up was the main LPG feed to the mixer and that was it. I flicked the switch listen to the motor stumble as it ran out of petrol, and flicked it one more notch and whey hey.. low and behold it ran perfect right from the off and has run on LPG ever since. Now when I fill up its more like £20 than £40 (bit more now I am useing the tanks full capacity) which makes the journey oh so much sweeter.. good luck and I know you will not look back if you join us guys who have got Gas!!!!!!!!!!!!!
Hopefully I haven’t missed anything out but ya never know so if you do spot anything or wish to know more just drop me a line.